Identifying a Ford 8.8 in Differential
The Ford 8.8 inch rear differential features a symmetrical 10 bolt cover. The differential cover somewhat resembles a square shape with large radius rounded corners. This axle is used in select 1983 to 2012 Ford F-150s and 1983 to 1996 Ford Broncos in addition to various Ford Ranger, Explorer, and Mustang models.
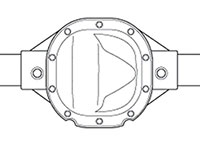
Ford 8.8 inch differential cover pattern
Click any thumbnail to view high resolution fullsize image w/ addition details (where applicable)
• Ensure that the vehicle is parked on a level surface and that the parking brake is set.
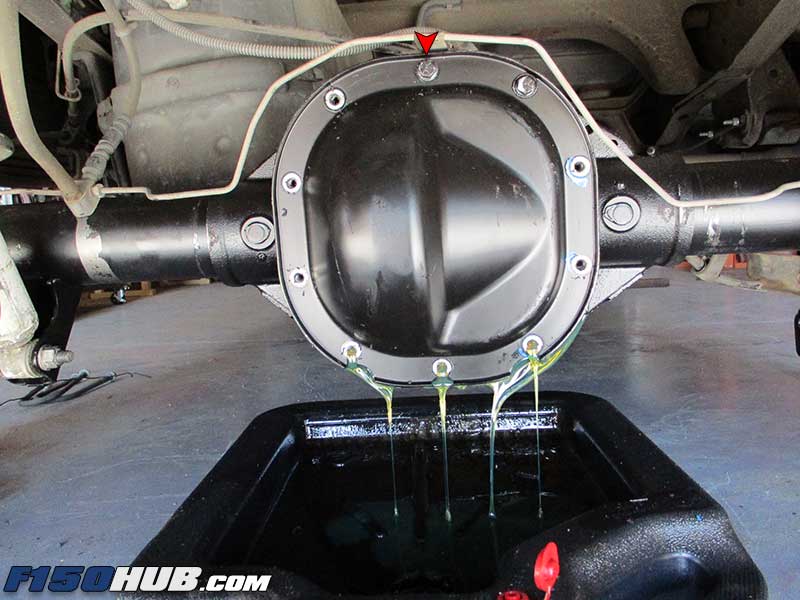
• Place a suitable container beneath the differential housing to drain the differential fluid into.
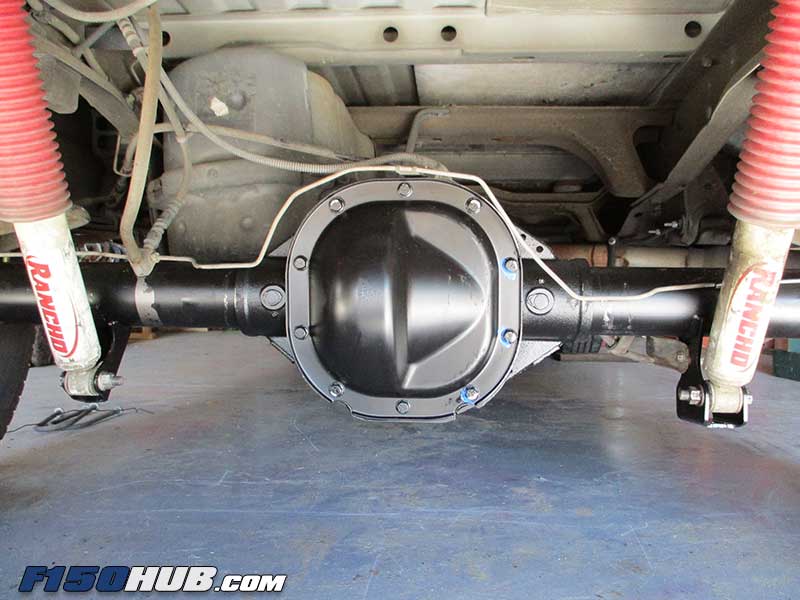
• The differential cover is held in place by ten (10) bolts with a 13 mm head.
• Loosen two of the top differential cover bolts until there is roughly 1/4" of protrusion; do not completely remove these bolts at this stage.
• Use a 13 mm socket to remove all the differential cover bolts except those loosened in the previous step.
• Gently pry the bottom of the differential cover pan until it unseats from the differential housing and the oil begins to drain. A razor blade or series of small screwdrivers is often useful in breaking the silicon seal. Do not bend the differential cover and work around the entire circumference to remove it evenly if it is stubborn.
• Once the majority of the differential fluid has drained, remove the last two (2) differential cover bolts followed by the cover itself.
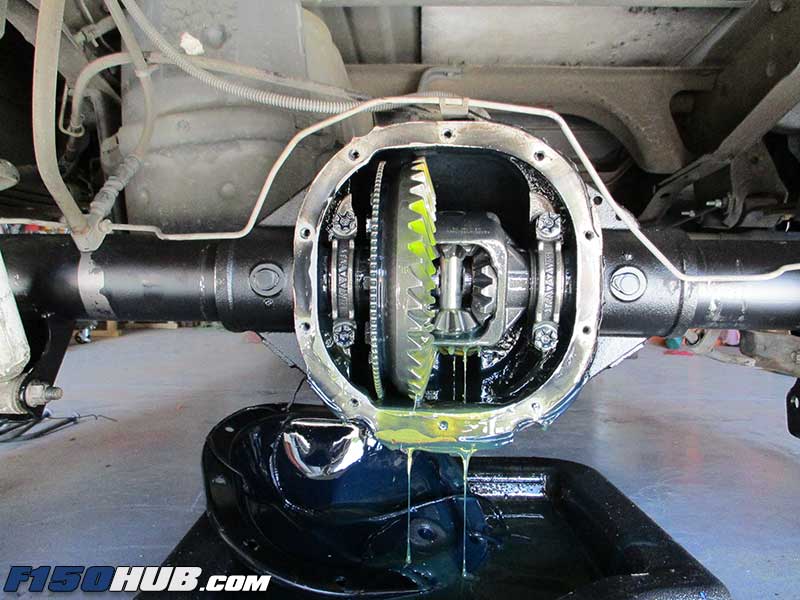
• Allow the differential to completely drain, then remove any remaining fluid from the differential housing with a lint-free cloth.
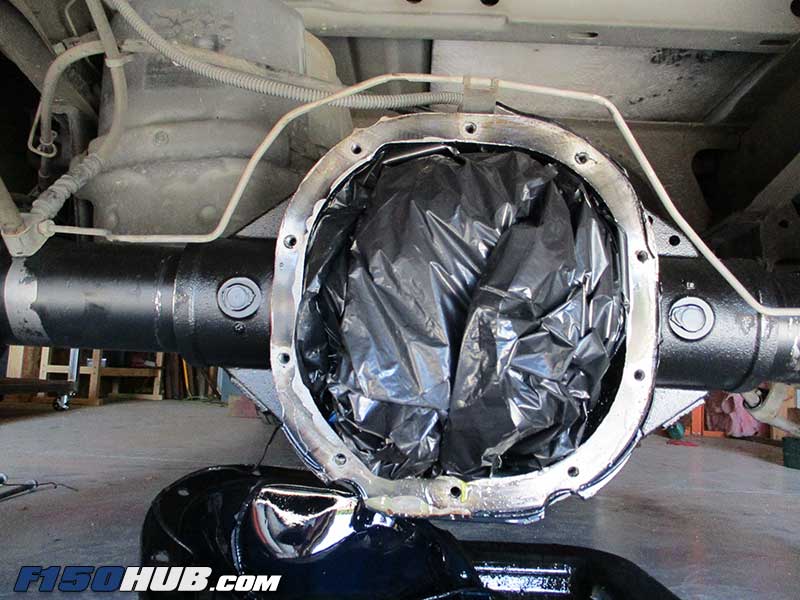
• Use a large plastic garbage bag to completely cover the differential and gear assemblies from contamination.
• Using a gasket scraper, razor blade, and a solvent such as acetone or brake cleaner (do not spray directly onto differential surface, apply to rag first), remove all remnants of the old differential gasket and/or silicon sealant. This surface must be oil free and completely clean before continuing.
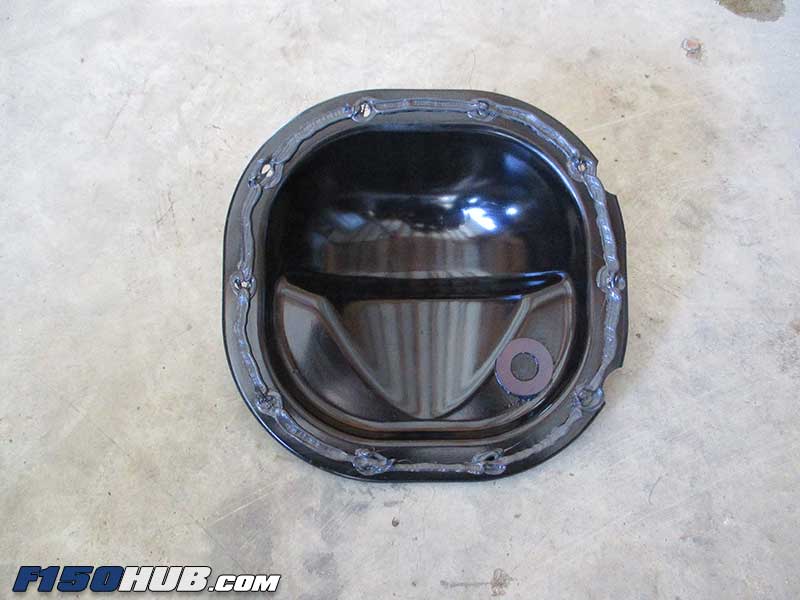
• Completely clean the differential cover in the same manner that the differential housing was cleaned in the previous step. The mating surface must be oil free and completely clean before continuing.
• Apply a continuous bead of silicon sealant (~1/4" will suffice, do not use an excessive amount of sealant) around the entire differential pan mating surface.
• Verify the orientation that the differential pan needs to be installed against the differential housing (there is a protrusion on the ring gear side of the cover), then carefully reinstall it. It is helpful to install two (2) of the top bolts first followed by the remaining hardware once it is properly held in place. Torque bolts to 20 - 25 ft/lbs in an alternating or crisscross pattern.
• Allow the differential cover sealant to cure per the manufacturer's specification before continuing.
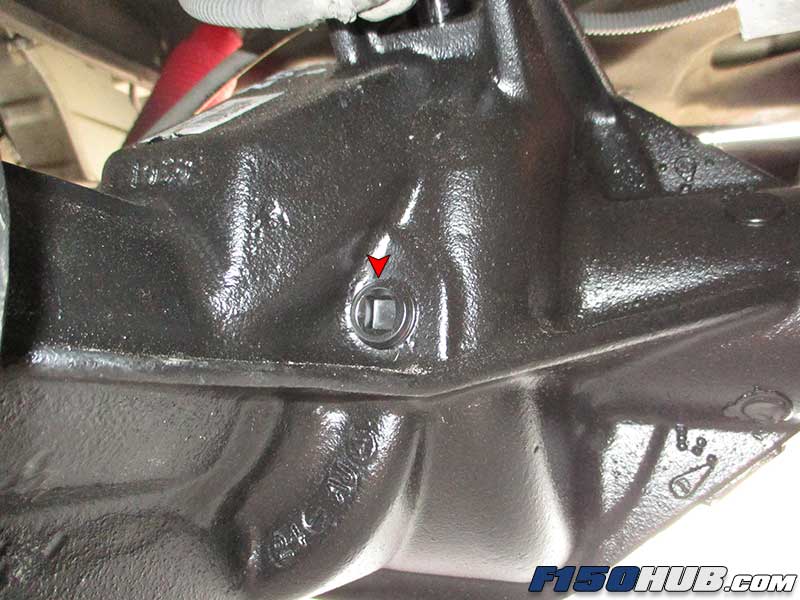
• Once the sealant has cured (typically a 24 hour period, more or less depending on ambient temperature), locate the differential housing fill plug. It is located to the driver side of the driveshaft at the front of the housing (see image).
• Remove the fill plug using a 3/8" male square drive (3/8" drive ratchet, etc) and fill the housing with fluid until it begins to run out of the fill hole; this is the proper indication that the differential fluid level is correct.
• Reinstall the fill plug, check for leaks, drive vehicle, and check for leaks once more.