4.6L and 5.4L Ford V-8 Serpentine Belt Part Number Chart
Model Year(s) |
Engine(s) |
Ford Part Number |
Application Notes |
1997 - 2001 |
4.6L V-8 |
with AC |
|
1997 - 2001 |
4.6L V-8 |
without AC |
|
2002 - 2003 |
4.6L V-8 |
with AC |
|
2002 - 2004 |
4.6L V-8 |
without AC |
|
2004 |
4.6L V-8 |
with AC |
|
2005 - 2006 |
4.6L V-8 |
with AC |
|
2005 - 2008 |
4.6L V-8 |
without AC |
|
2007 - 2008 |
4.6L V-8 |
with AC |
|
2009 - 2010 |
4.6L V-8 |
with AC |
|
1997 - 1998 |
5.4L V-8 |
with AC |
|
1999 - 2001 |
5.4L V-8 |
without AC |
|
1999 - 2001 |
5.4L V-8 |
with AC |
|
2002 - 2003 |
5.4L V-8 |
with AC |
|
2002 - 2004 |
5.4L V-8 |
without AC |
|
2004 |
5.4L V-8 |
with AC |
|
2005 - 2006 |
5.4L V-8 |
with AC |
|
2005 - 2008 |
5.4L V-8 |
without AC |
|
2007 - 2008 |
5.4L V-8 |
with AC |
|
2009 - 2010 |
5.4L V-8 |
with AC |
Note - chart above does not include factory supercharged engines (Lightning, Harley Edition).
Serpentine Belt Removal and Installation Procedures
Click any thumbnail to view high resolution fullsize image w/ addition details (where applicable)
• Make sure you have the correct belt length and rib count. These vary depending on model year and engine configuration.
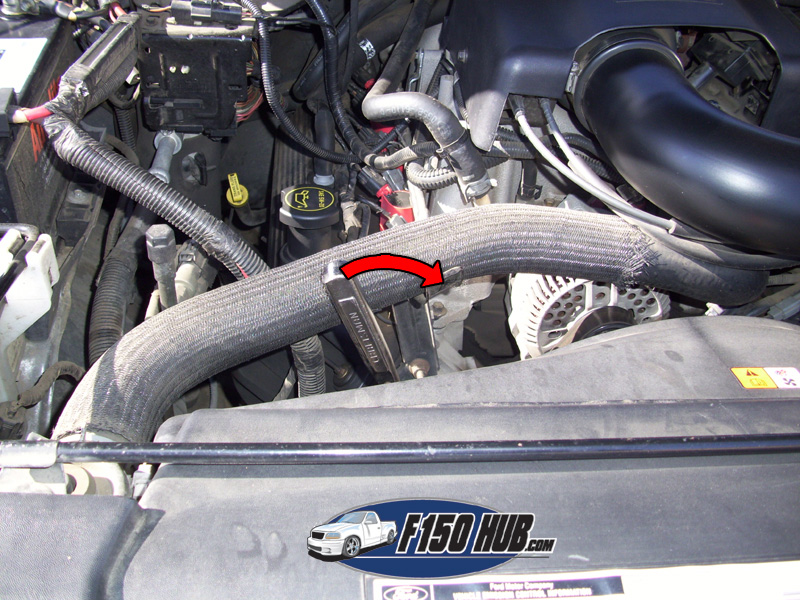
• Locate the belt tensioner. On our 4.6L, the belt tensioner assembly is located passenger side on the front of the engine (just below the alternator).
• Insert your 1/2 inch drive breaker bar or belt tensioner tool (preferred) into the front of the tensioner. The tensioner is made of very soft cast aluminum, so ensure your tool is fully inserted before continuing.
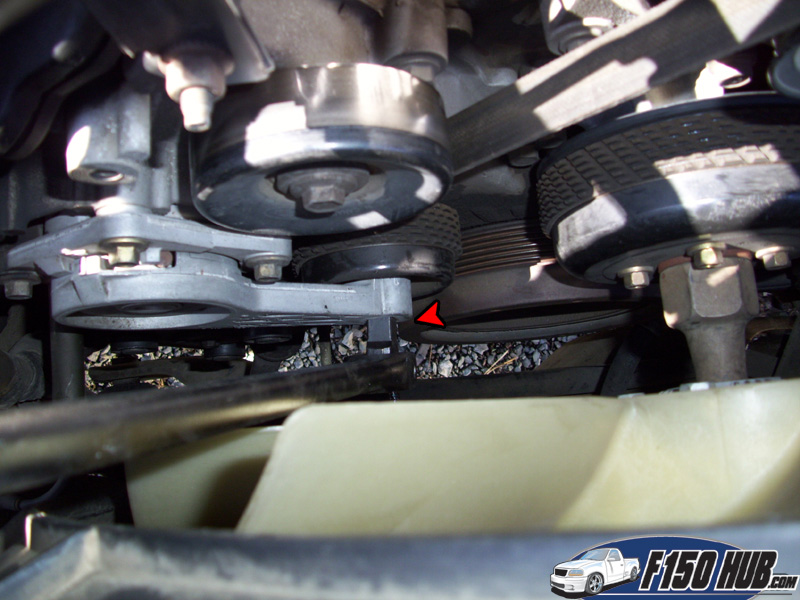
• Rotate the tensioner clockwise (towards driver side) to release tension on the belt. While maintaining pressure on the tensioner, slide the belt off of the top pulley. Release the tensioner and completely remove the old belt.
• Study the diagram found on the fan shroud or in your owner's manual and begin installing the new belt to those specifications. It is vital that the belt is installed per this diagram.
• You should have the belt installed with the exception of the top pulley (alternator, in our instance). Once again use your 1/2 inch drive tool to release the tensioner. This should allow you ample room to install the belt over the last pulley.
• With the belt completely installed, release the tensioner and double check your work. Make sure the belt is installed properly on all pulleys.