DISCLAIMER - Brake system repairs should only be performed by a qualified technician. There are severe consequences for improper brake service/repair. There is a high risk of personal injury or death whenever working on a suspended vehicle.
Front Brake Pad, Rotor Replacement
Click any thumbnail to view high resolution fullsize image w/ addition details (where applicable)
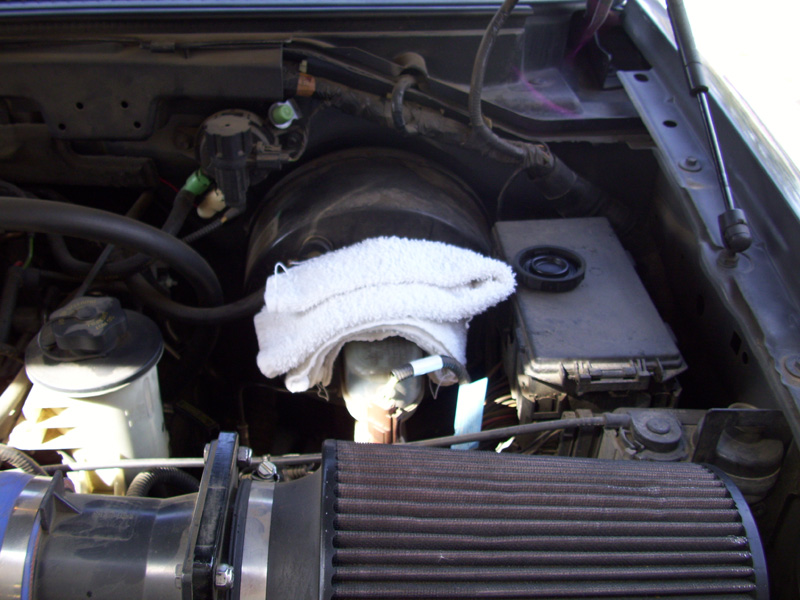
• Remove the cap from the master cylinder reservoir and place a rag over it. This is necessary because the system cannot be pressurized when the caliper pistons are being depressed into the caliper (future step). The rag will catch any fluid overflow and protect debris from entering the reservoir.
• Use a breaker bar or similar tool to loosen the lug nuts, then jack the vehicle up and remove the tire. Support the truck with jack stands, never work under
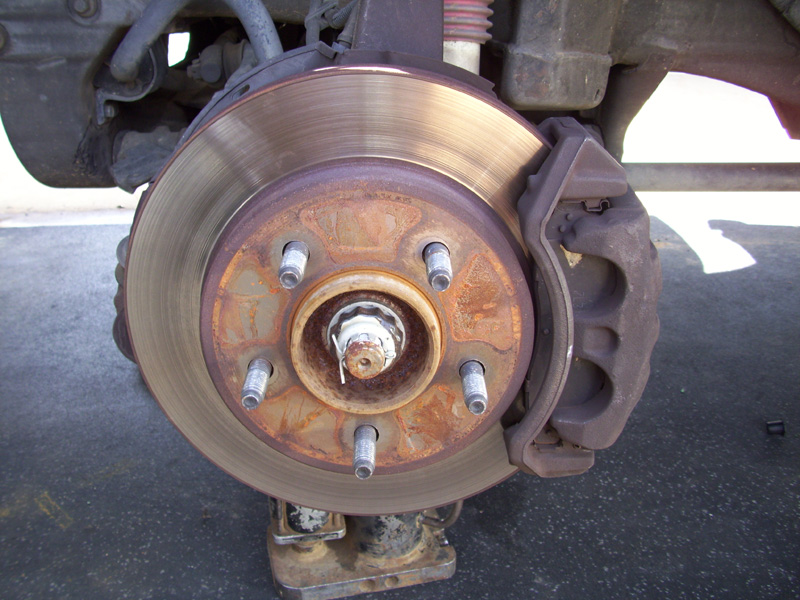
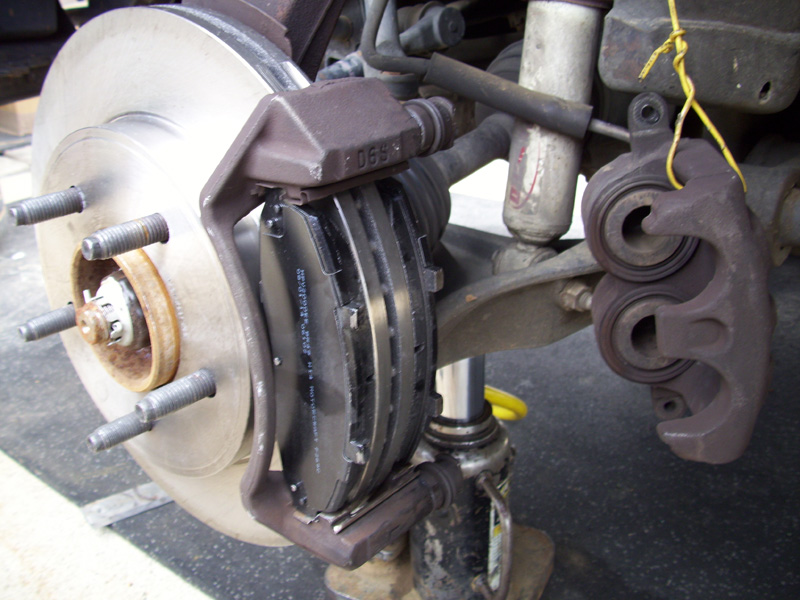
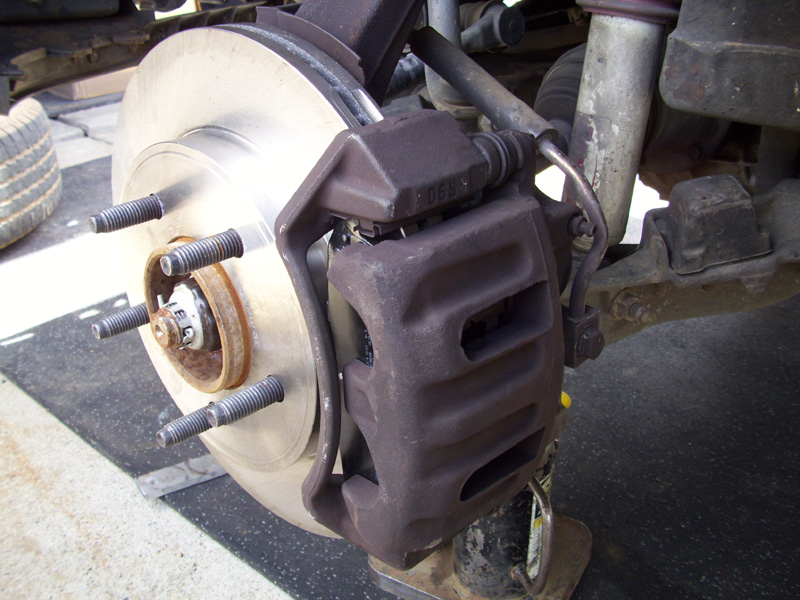
• With the tire removed, you'll have access to the brake assembly.
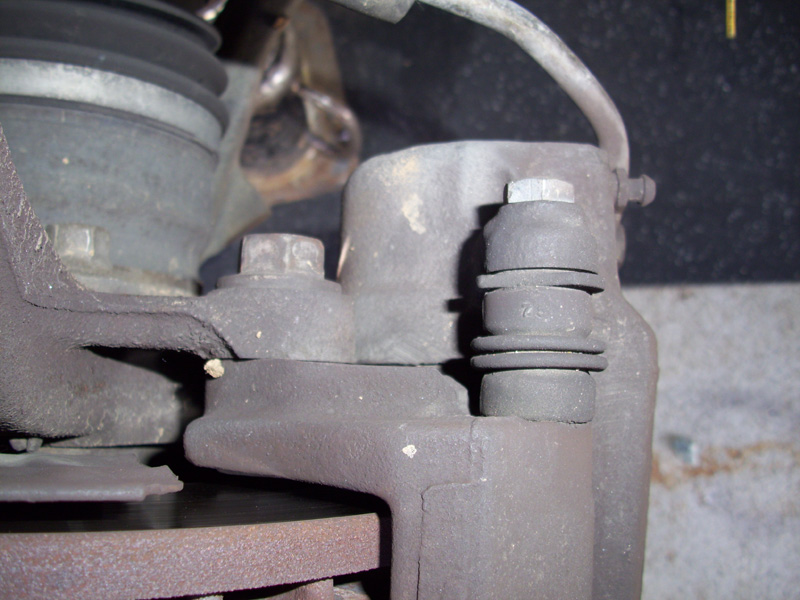
• Looking at the back of the caliper, the large bolt on the left requires an 18 mm socket, while the smaller bolt on the right requires a 13 mm socket. There are two large and two small bolts, one of each at the top and bottom of caliper.

• Remove the 13 mm bolts so the caliper can be removed from the bracket. Hang the caliper using a piece of wire (solid core electrical wire or bailing wire both work well) so that there is no pressure on the brake line. Do not let the caliper hang from the brake line and do not disconnect the brake line!

• Remove the two 18 mm hex head bolts so that the caliper bracket and be removed. Then, the brake rotor should slide right off (if it doesn't, persuade it with a dead blow hammer).
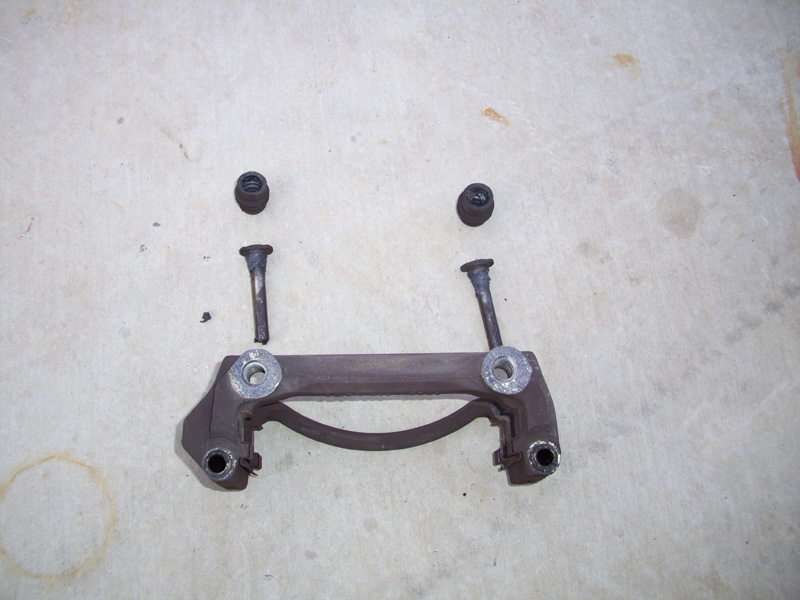
• The caliper bracket carries the caliper slide pins. Remove the rubber boot from the slide pins and set them aside for now.

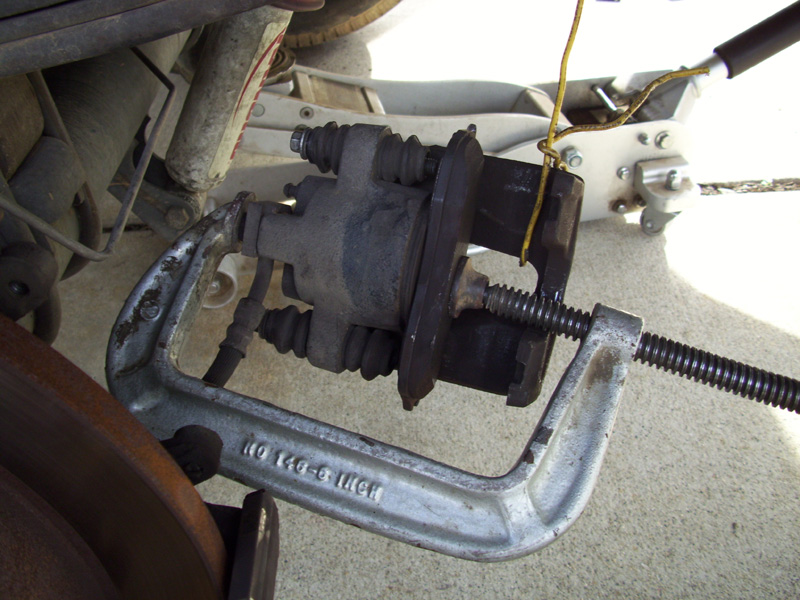
• Using a large C clamp or brake caliper tool, force the piston back into the caliper (this is why we removed the master cylinder cap earlier). Use a block of wood, metal, or even one of the old brake pads over the pistons to distribute the pressure over both pistons as well as protect them (they are made of plastic and can easily crack). Do this until the piston is recessed in the caliper and no longer protruding(see picture at left) or you will not be able to slide the caliper over the new brake pads.
• Clean the slide pins and slide pin slots thoroughly with brake cleaner.
• Clean any old grease from the inside of the slide pin boots with a cloth or paper towel. Do not use any solvent on the boots, as it may cause them to deteriorate.
• Apply liberal amounts of grease to the slide pins, reinstall the protective boots, and then work them back and forth in their slots until they operate smoothly (you will likely have an air pocket in the holes that needs to be worked out).
• Prep the new brake rotor by cleaning it with liberal amounts of brake cleaner and wiping it with a clean rag. The rotors are usually soaked in oil to prevent them from rusting; this must all be removed!
• Install the new brake rotor, then the brake caliper bracket. Coat the mounting bolts liberally with thread locker and ensure they are tightened down (don't be afraid to use a breaker bar to torque them down good and tight).
• Replace the old anti-rattle clips (metal clips) if applicable, then install the new brake pads as pictured to the left (verify that inner and outer pads are identical).
• Install the caliper over the brake pads, making sure that the slide pins are properly aligned in their grooves. Reinstall the top and bottom caliper bolts, again using thread locker to prevent them from backing off in the future.
• Reinstall the tire and torque the lug nuts to Ford's specifications, which are located in the truck's owners manual.
• Repeat for the opposite side front brake.
Rear Brake Pad, Rotor Replacement

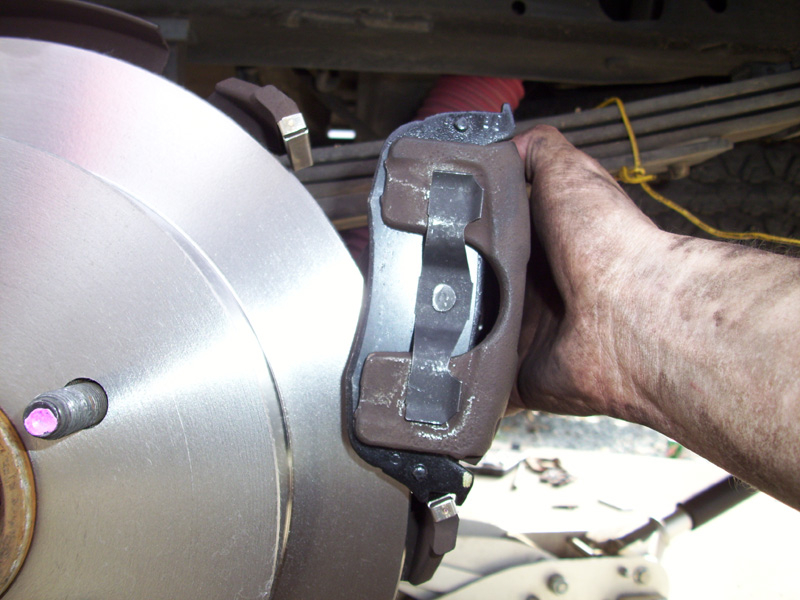
• While the front brake pads are universal for the driver and passenger side, the rear pads are not in this instance. Take note of the feet on the pads (red arrows in picture). Use the old pads as a guide so that you select the proper inner and outer pad for the driver/passenger side rear brakes.
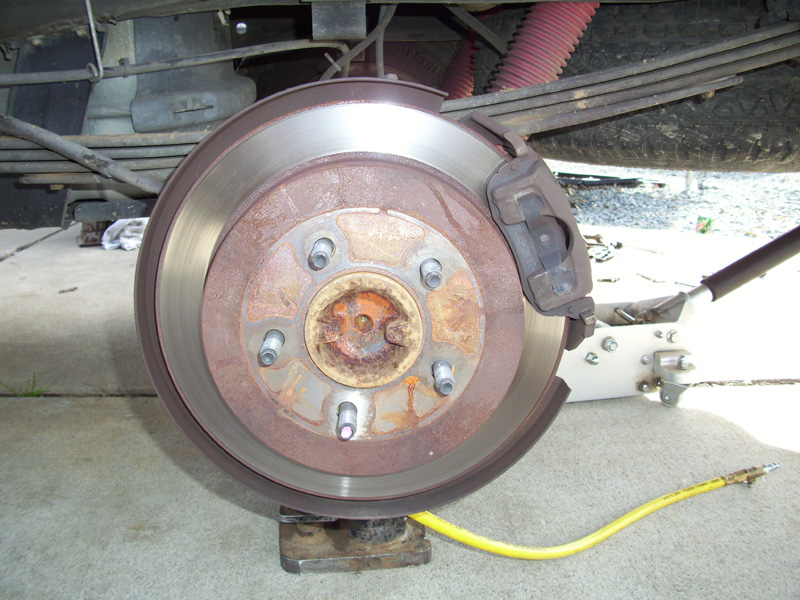
• Jack up the rear axle, support the axle with jack stands, and then remove the tire. You'll notice that the rear brake caliper is significantly smaller than the front.

• Remove the (2) bolts from the backside of the caliper with a 10 mm socket and suspend it with a piece of wire just as was done with the front. There is no caliper bracket that needs to be removed on the rear brakes. Again, do not suspend the caliper using the brake line, and do not disconnect the brake line.
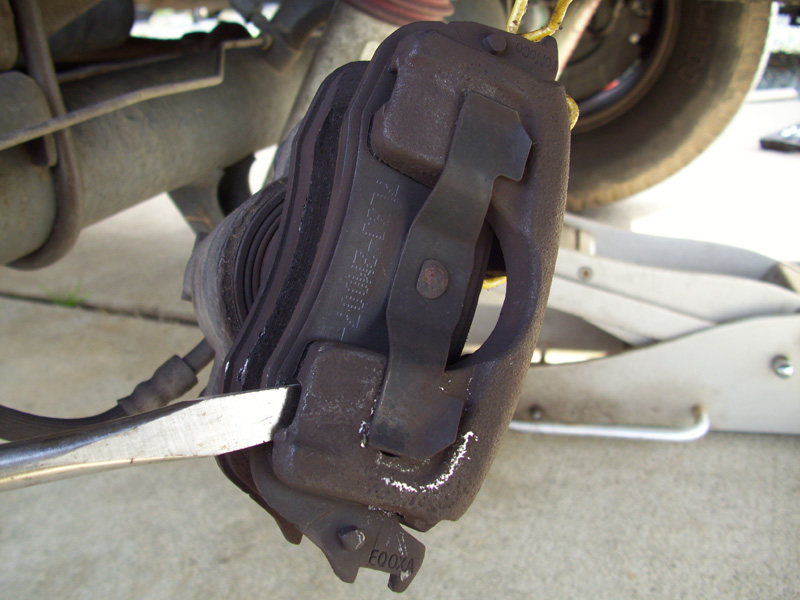
• The outer pad is held in place by a large clip. Use a screwdriver or small pry bar to wedge the brake pad from the caliper. If the old pad is stubborn, two large screwdrivers come in handy. Use one to pry the clip upwards and another to push the pad out of the caliper.
• The inner pad is also held in place by a three pronged clip that seats inside of the caliper piston - it just pops out with a little force.
• Use a large C clamp or brake caliper tool to force the piston into the caliper. This can be done with the inner brake pad still attached, as pictured.
• With the piston seated in the caliper, install the new brake pads, ensuring that they clip into place properly.
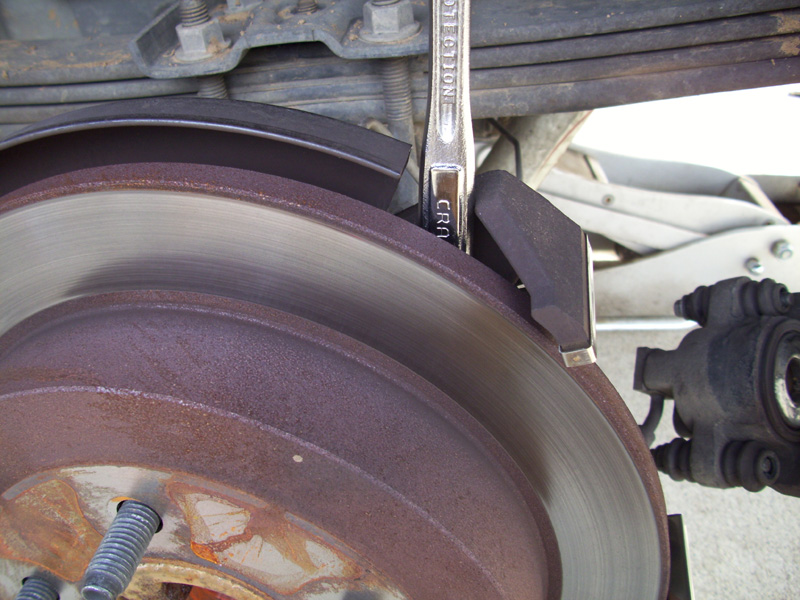
• Remove the old brake rotor. The emergency brake must be released for this to occur. If the rotor is stubborn, pry it off by wedging the handle of a socket wrench or breaker bar between the rotor and the caliper bracket. The drum brake mechanism for the emergency brake often causes enough friction that it does not slide off freely. If needed, persuade the drum with a sledge or dead blow hammer (tap it 360 degrees while applying pressure, do not attempt to pound it off).
• Remove, clean, grease, and reinstall the slide pins similar to the procedure for the front brakes.
• Thoroughly clean and install the new brake rotor.
• Install new anti-rattle clips and then reinstall the brake caliper. Notice how the feet on the bottom of the brake pads must seat into the caliper bracket. See picture for clarification. Reinstall the caliper using thread locker on the bolts.
• Reinstall wheel/tire and torque lug nuts. Repeat for opposite side.
• Reinstall the master cylinder cap, pump the brakes until the pedal is firm, and cautiously test drive.
Additional Considerations:
• Always clean the rotors with brake cleaner before and after installation to remove all traces of grease/oil.
• Always use thread locker on the caliper bolts.
• Before test driving on the open road, ensure that the brakes are working.
• Re-torque lug nuts once the truck has been driven ~50 miles.
• If you have never worked on brakes before, allow an experienced technician to assist you. A mistake here could cost your life or the life of others. This is not a procedure that an unexperienced person attempt on their own.