Click any thumbnail to view high resolution fullsize image w/ addition details (where applicable)
• The correct oil viscosity is listed on the oil fill tube. If it is eligible or missing, refer to the viscosity specs above. You will need 6 quarts of oil for all 4.6L engines and 1997 to 2003 model year 5.4L engines. 2004 to 2010 model year 5.4L engines require 7 quarts of engine oil. Always refer to your owners manual to verify oil specifications for your vehicle.
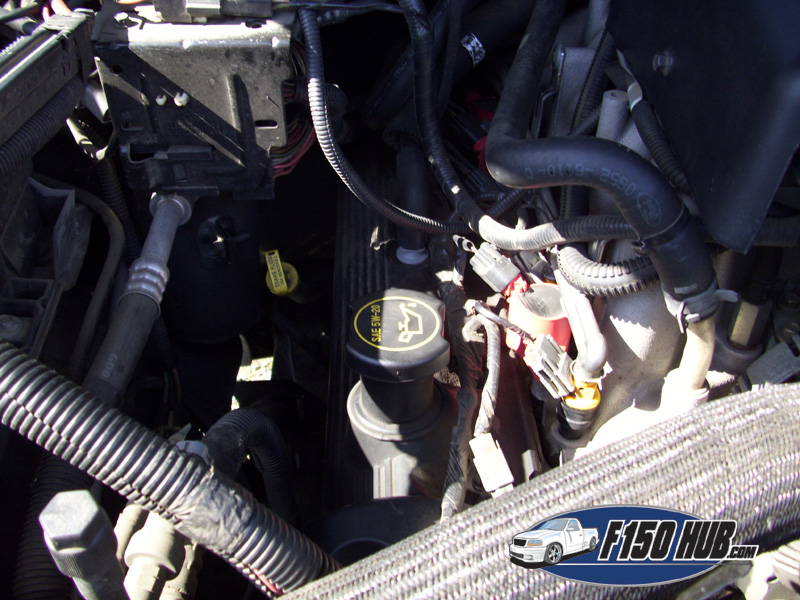
• Locate the oil fill cap in the engine bay on the passenger side valve cover. Loosen the oil fill cap but do not remove (sometimes this helps the oil drain quicker).
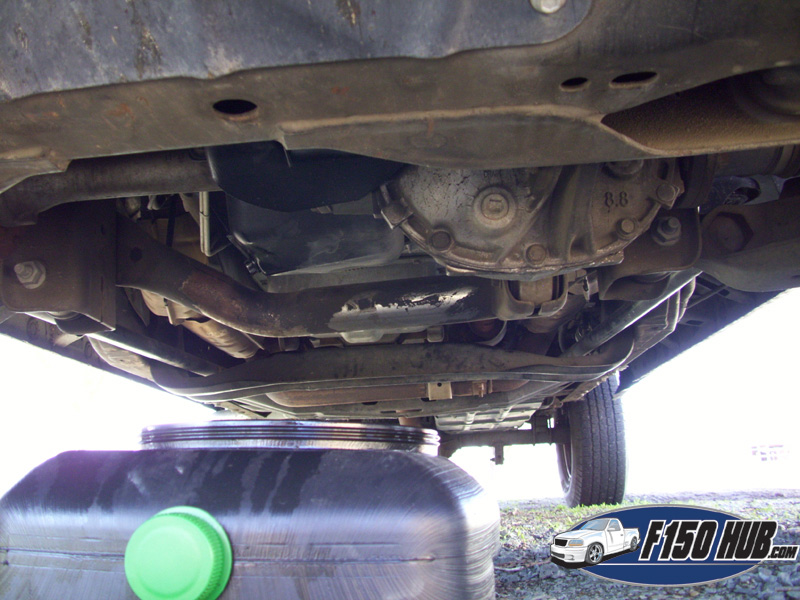
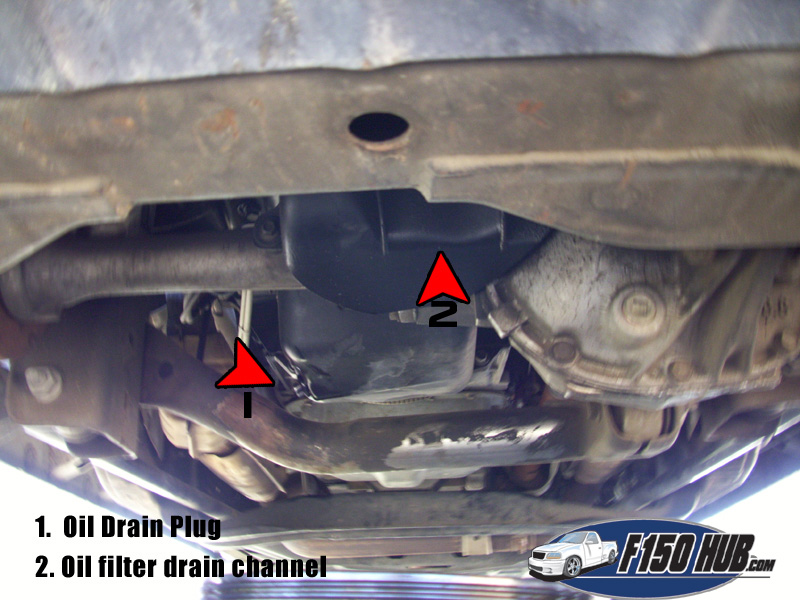
• Position an oil drain container beneath the drain plug on the engine oil pan. If your oil drain plug is located on the side of the oil pan, you will need to position it so that the oil lands in the container and not the ground (it will have a tendency to shoot out rather than drain straight down).
• Remove the drain plug using a boxed end wrench or socket - do not attempt to remove the drain plug with an open end wrench as it will strip easily.

• Since motor oil is a hazardous material, it is recommended that you wear latex/oil resistant gloves.
• While the oil is draining, clean the oil drain plug with a lint free rag. Do not use solvents.
• When the used oil has drained completely, reinstall the drain plug. Hand tighten the plug as much as possible to eliminate cross threading. If the oil pan threads are stripped, the entire oil pan will need to be removed in order to replace or repair it properly. Once hand tightened, finishing tightening the drain plug with a wrench/socket. Ensure the plug is snugged down - do no overtighten.
• Reposition the oil container under the oil filter or appropriate filter drain channel if equipped. Most 4.6L/5.4L equipped trucks have an oil filter drain slide located above the center of the front axle.
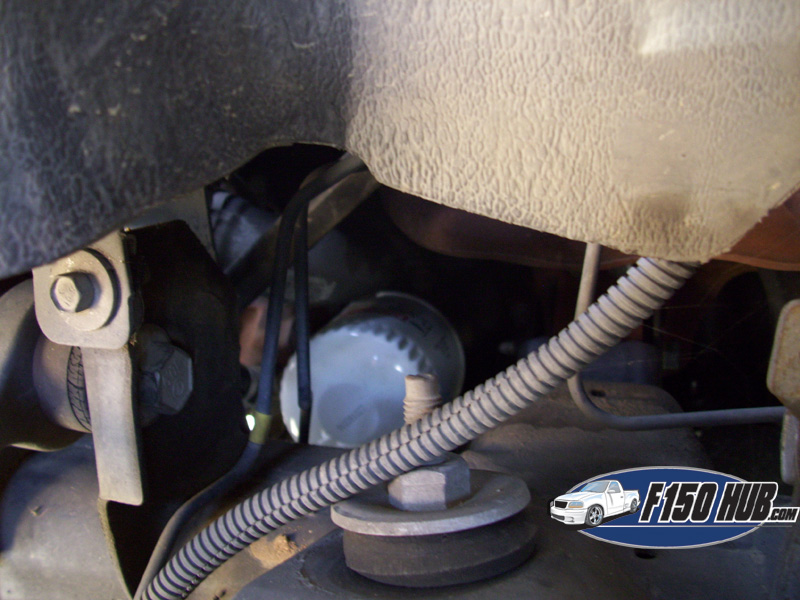
• Remove the oil filter by unscrewing it from the engine block. On 4.6L/5.4L engines, the filter is located on the driver side of the engine block and is best accessed by crawling under the vehicle and reaching upwards. It may seem difficult to access, but after a few oil changes you will get the hang of it. An oil filter wrench may be used to assist you however, if the filter was installed correctly, it should come off by hand. Properly dispose of the oil filter. A plastic zip loc style bag is normally accepted for recycling purposes. If it is tight and you are unable to access it with an oil filter wrench, try wrapped a piece of sandpaper (we use emery cloth) around the filter. You can typically grip the sandpaper better than the canister itself, especially if it is oily.
• Clean the oil filter mounting surface with a clean, lint free rag, ensuring that the old filter gasket is not stuck to the mounting surface. Do not use solvents. Be sure the surface is clean before continuing.

• Prepare your new replacement oil filter by applying a small amount of fresh motor oil to the oil filter gasket (the rubber o-ring mounted to the surface of the new filter). Using your finger, rub the oil around the gasket until it is completely lubricated (this is vital to getting a good seal).
• If you would like, you may fill the new filter with 1 quart of fresh motor oil. This step is not required, though some speculate it prevents dry starts after changing the motor oil. It is difficult to install a filled oil filter when it is mounted horizontally on the engine block without spilling. We like to, at minimal, "wet" the filter by filling it with ~1/2 a quart of fresh oil.
• With the gasket properly lubricated, install the new oil filter in the same fashion you removed it. Do not use an oil filter wrench to tighten the filter. Snug the filter so that it seats tightly against the mounting surface. There is no need to overtighten the filter, simply tighten it as much as possible by hand. You should be able to remove the filter by hand at your next oil change if it was installed properly (some strength required).
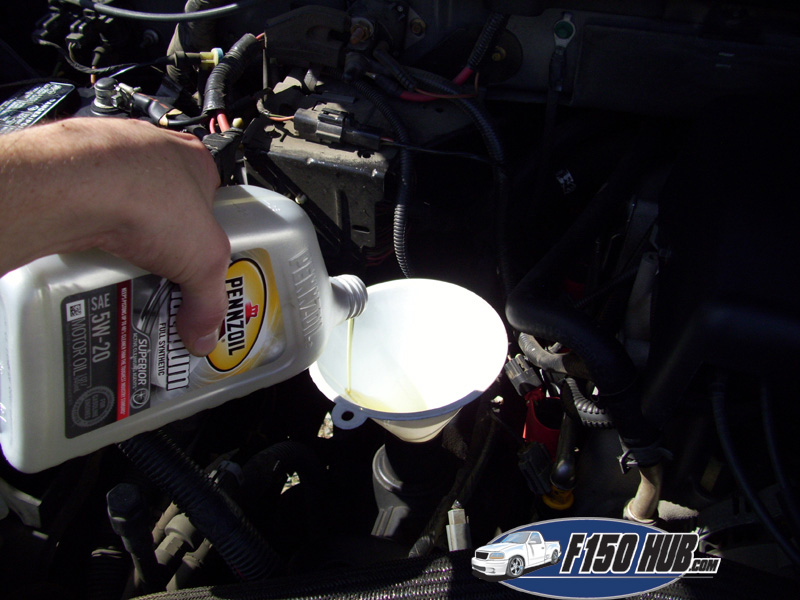
• With the oil drain plug and new oil filter installed, it is time to add your new engine oil. Remove the oil fill cap and stick a clean, oil safe funnel into the fill neck. Slowly poor in the required amount of new engine oil.
• After you have filled the engine with oil, reinstall the oil fill cap.
• Pull the dipstick and verify the engine oil level. If the oil level is low, double check that you used the correct amount.
• Check for leaks around the oil filter drain plug, then start the truck. The oil pressure gauge should travel to normal within 5 to 10 seconds, otherwise something was done incorrectly and there is a problem. Use a flashlight to check for leaks around the oil filter.