Click any thumbnail to view high resolution fullsize image w/ addition details (where applicable)
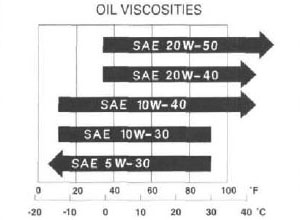
• TRX450R Viscosity Index
10W-40 covers the broadest ambient temperature range and is the most widely recommended viscosity for the Honda TRX450R, although other oils are acceptable so long as the conditions in the viscosity index chart are met.
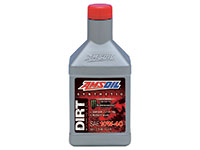
We're using Amsoil's full synthetic "Dirt Bike" 10W-40 oil. We can attest to the quality of the engine/transmission oil and its favorable characteristics when used in the TRX450R, which include a significantly improved, highly comfortable clutch feel and engagement properties. To learn more about this product, we recommend visiting: Amsoil Synthetic Dirt Bike Oil
• Start and allow engine to idle for 2 to 3 minutes, then allow to cool for 3 to 5 minutes before proceeding. Briefly running the engine allows the oil to drain quicker/easier, while the cool down time allows the oil to drain back into the crankcase.
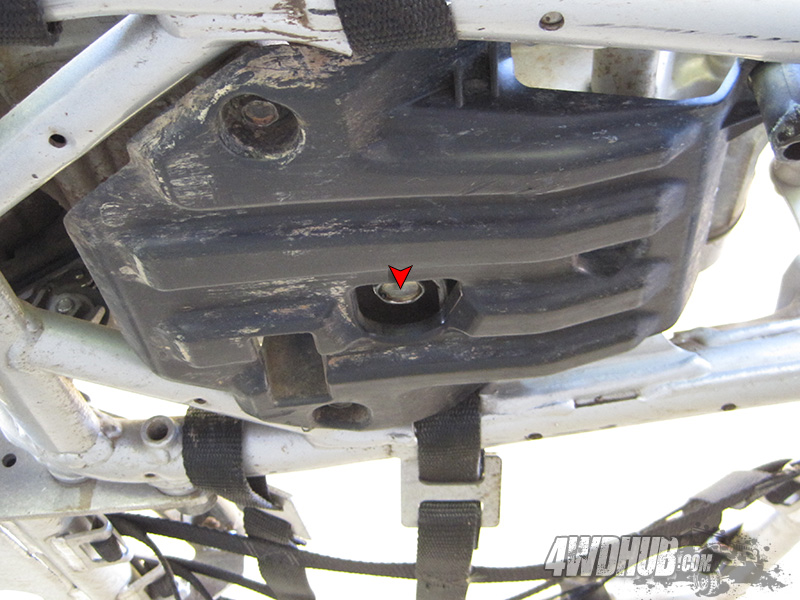
• Place a catch/drain pan beneath the engine and then locate and remove the crankcase drain plug. It is located underneath the engine recessed in the skid pan (see image) and has a 17mm bolt head.
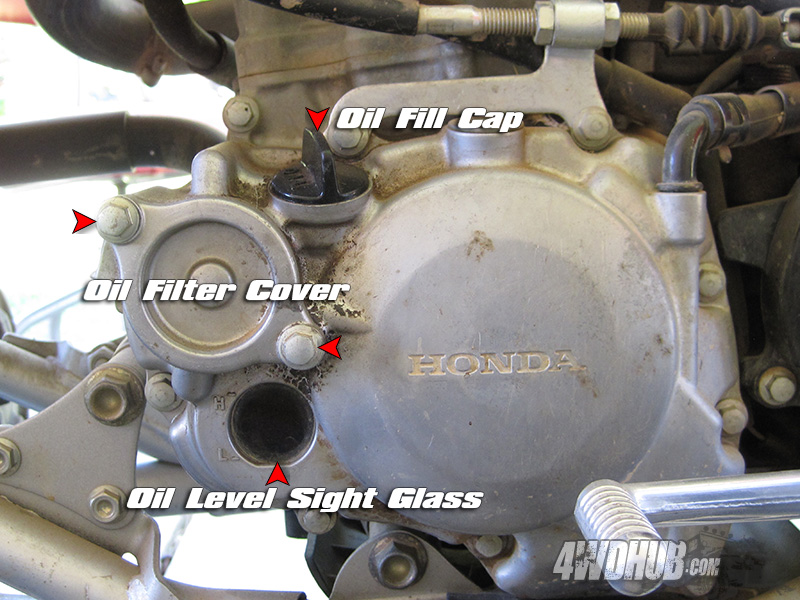
• The oil filter cover is located on the left side (shifter side) of the engine in the vicinity of the oil fill cap. Using an 8mm socket carefully remove the two cover bolts (refer to image).
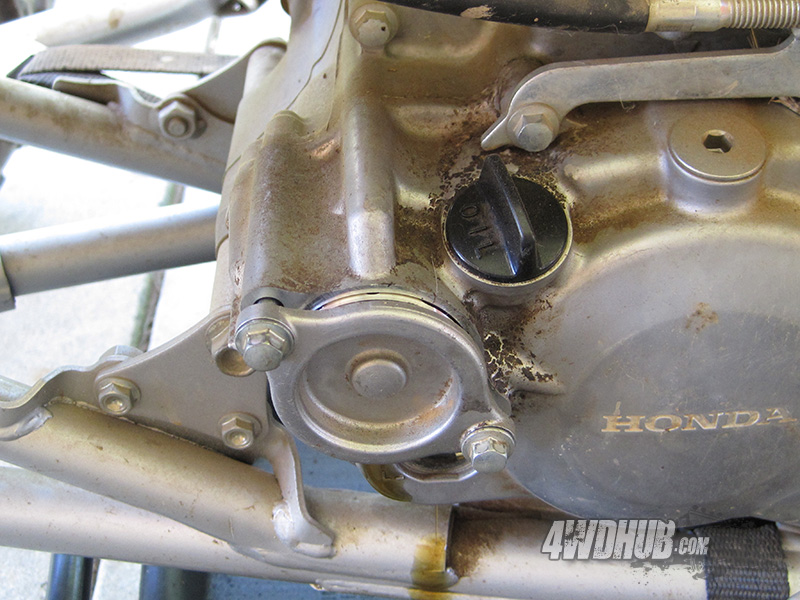
• To ensure the cover comes off straight and smoothly, alternate loosening the left and right bolts. The filter is spring loaded so support the cover while you remove the bolts, then carefully remove the entire assembly.
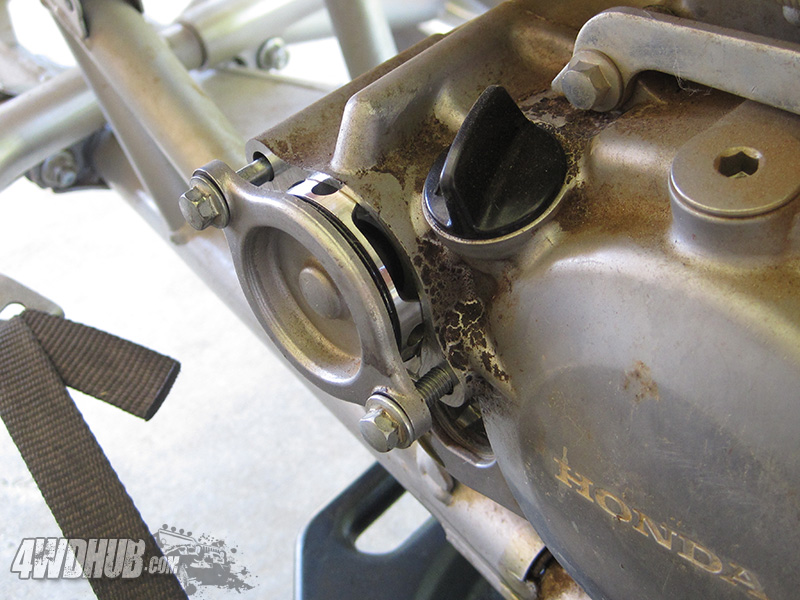
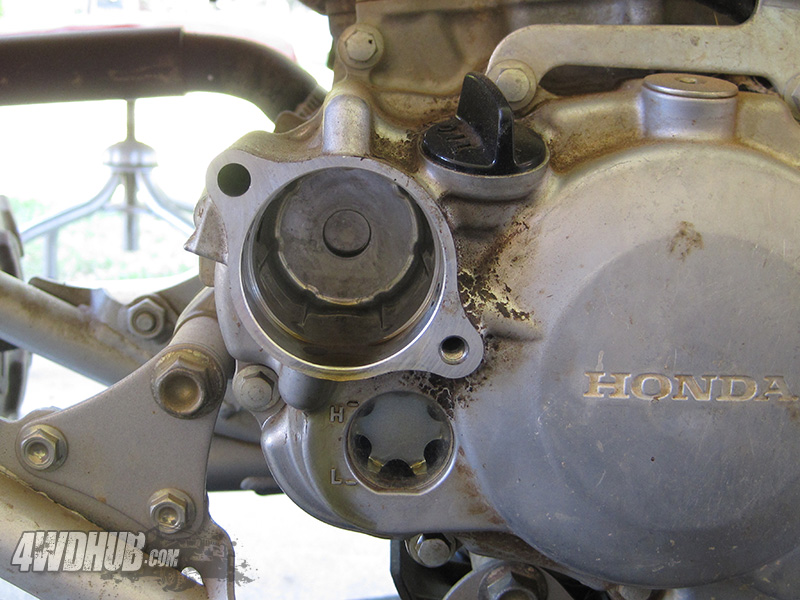
• Note - The oil filter cover assembly must be installed in the position that it was removed! If you look carefully, you’ll notice that the oil passages cast into the engine block align with the holes in the oil filter cover assembly. If necessary, mark the cover and engine block so that it is reinstalled in the correct position. In addition, the long bolt goes on the left hand side of the cover, while the short bolt belongs to the right hand side of the cover.
• Remove the old filter from the oil filter cover assembly, apply a thin coating of fresh motor oil to the rubber oil filter grommet, then reinstall in reverse order.
• Lightly coat the o-ring on the oil filter cover with fresh motor oil. If it is cracked or damaged, it will need to be replaced.
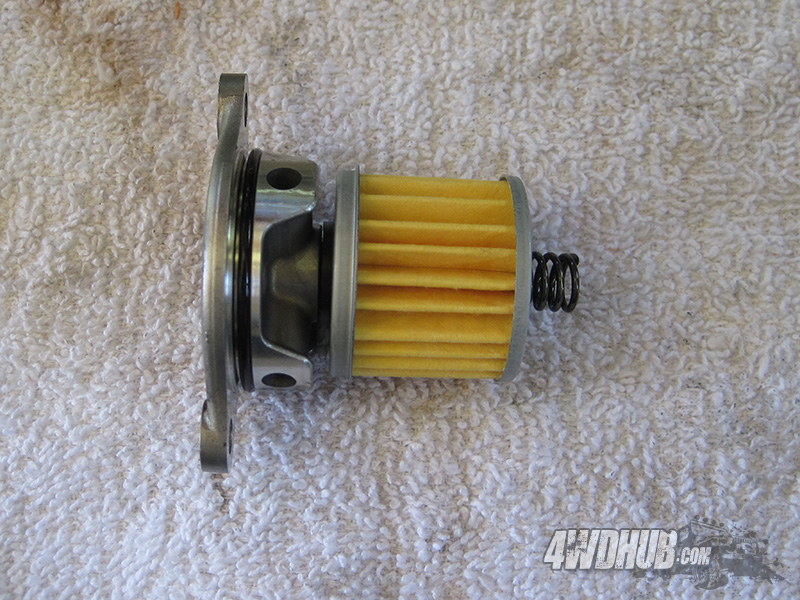
• Place the spring in the detent on the rear of the oil filter, then carefully reinstall the entire assembly. The spring must seat into the detent on both the oil filter and oil filter housing. Alternatively, you can install the spring into the housing, then install the oil filter, and finally install the cover.
• Tighten down the oil filter cover, alternating between the left and right bolts. Do not overtighten, it only needs to be snug.

• Coat the drain plug with fresh engine oil and reinstall – torque to 16 lb-ft for 2004 – 2005 model years and 18 lb-ft for 2006-2014 model years. Remove the oil fill cap and add oil until it reaches just below the “H” level of the sight glass.
• With the kill switch in the off position so that the engine will not start, crank the engine over several times. Check the fluid level and add as necessary.
• Turn the kill switch to the on position, start the engine, and allow to run for 1 to 2 minutes. Let engine cool for 3 to 5 minutes, then perform a final check and add fluid as necessary.
• The fluid level should be at or just below the “H” on the sight glass. 2004 and 2005 model years require 0.87 quarts of oil, 2006-2014 model years require 0.73 quarts.