1997 - 2003 F-150 Brake Master Cylinder Part Numbers
Model Year/Application |
Part Number(s) |
Remarks |
1997 - 1999 |
Motorcraft BRMC69 (Ford F75Z-2140-NC) |
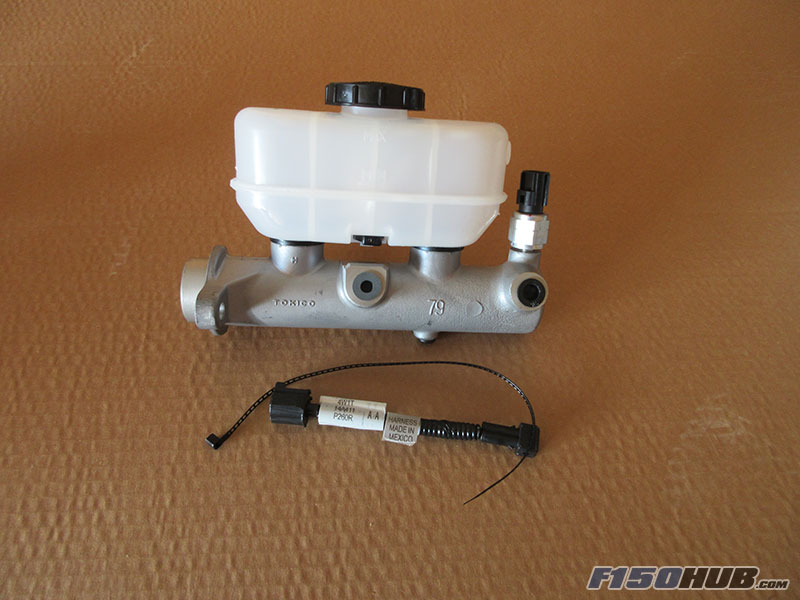
Includes brake pressure sensor & harness adapter pigtail |
2000 - early 2002 w/ cruise control |
Motorcraft BRMC58 (Ford YLIZ-2140-AC) |
Includes brake pressure sensor & harness adapter pigtail. Early 2002 is build date prior to 12/13/2001. |
2000 - 2003 w/o cruise control |
Motorcraft BRMC107 (Ford 3L3Z-2140-BA) |
For vehicles NOT equipped with cruise control (AKA speed control) only |
Late 2002 w/ cruise control |
Motorcraft BRMC16 (Ford 1L1Z-2140-AB) |
Includes brake pressure sensor & harness adapter pigtail. Late 2002 is build date 12/13/2001 and later. |
2003 w/ cruise control |
Motorcraft BRMC20 (Ford 3L3Z-2140-DA) |
Includes brake pressure sensor & harness adapter pigtail |
1997 - 2003 F-150 Brake Master Cylinder Replacement Procedures
Click any thumbnail to view high resolution full-size image with details
• Disconnect the negative battery terminal.
• Optional - use a suction gun or syringe to drain the master cylinder fluid reservoir. Doing so may reduce the risk of spilling brake fluid while removing the master cylinder.
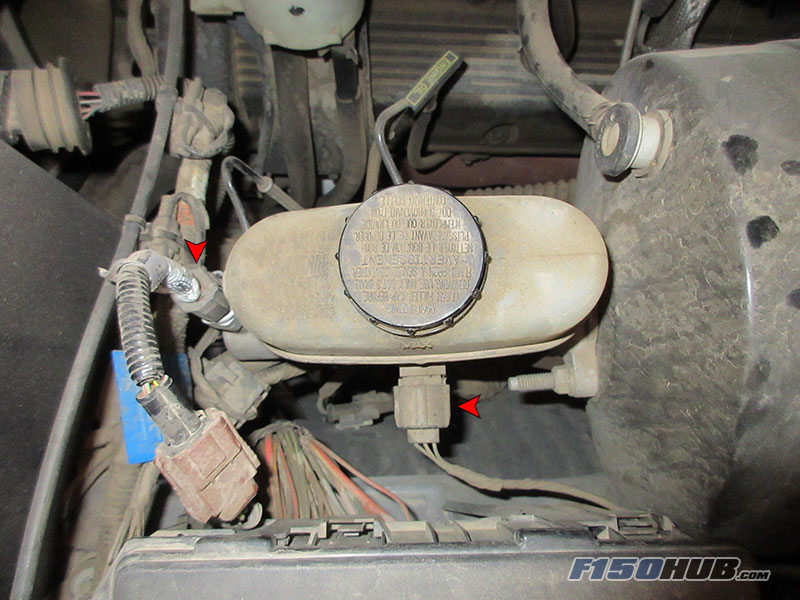
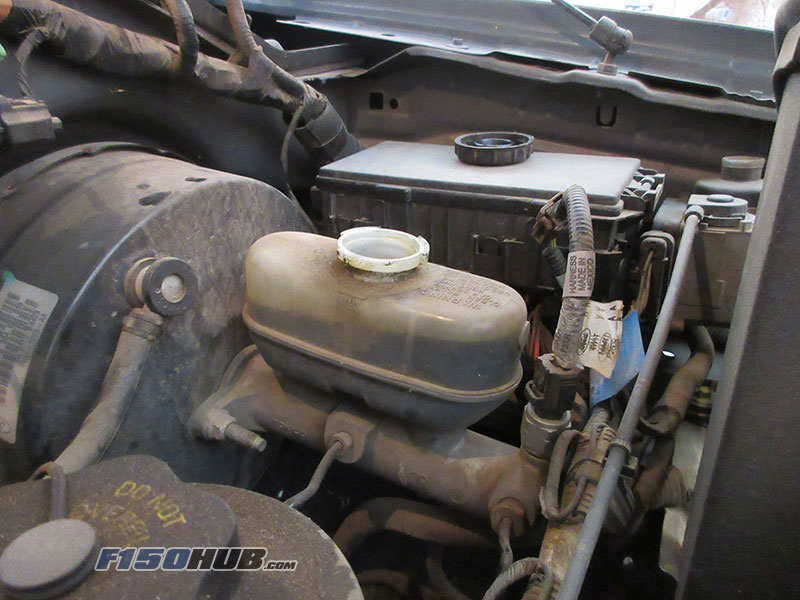
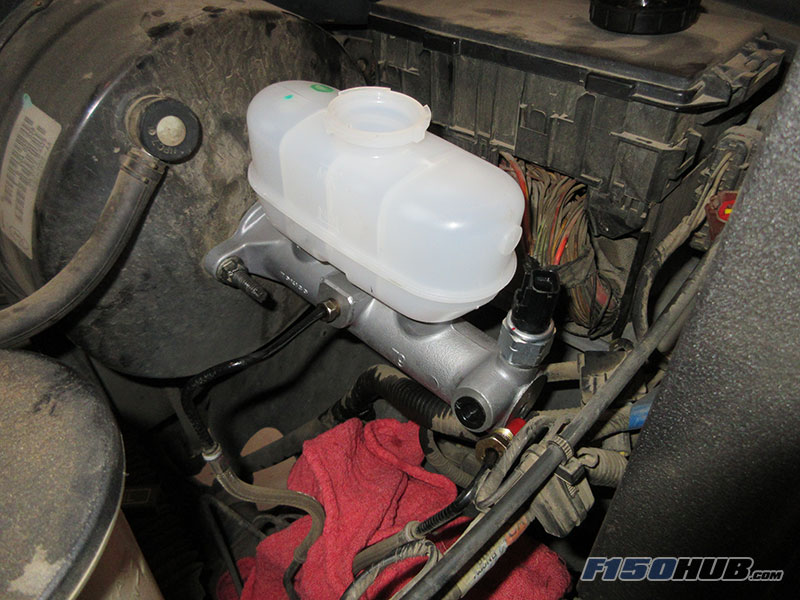
• Disconnect the fluid reservoir level sensor from the side of the master cylinder.
• Disconnect the brake pressure sensor connector; the pressure sensor is located at the front of the master cylinder (may not be applicable to vehicles not equipped with cruise control).
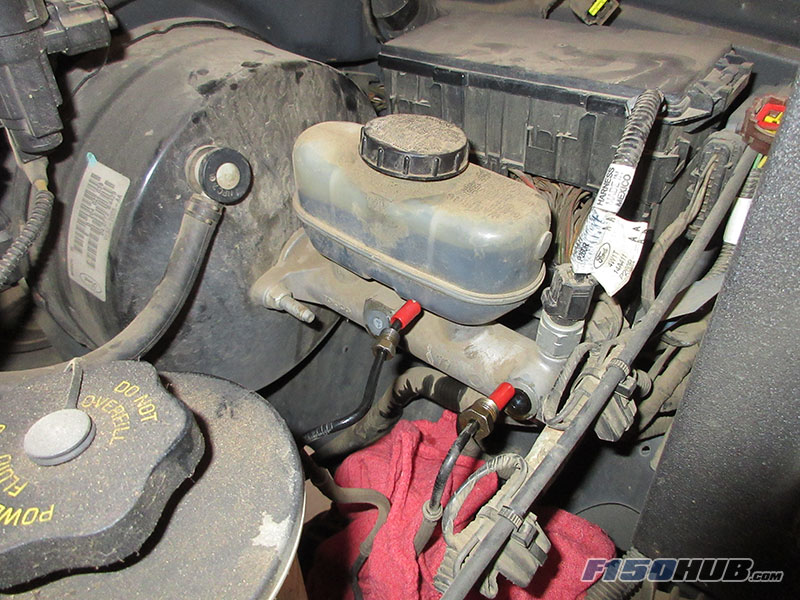
• Disconnect both brake lines from the side of the master cylinder and plug all ports with appropriate caps. Vacuum caps work well for the brake line flare fittings while the master cylinder ports can be capped off using the protective plugs found on the replacement part. A flare nut wrench should be used on the brake line fittings; an open end wrench is not recommended (5/8" for the larger line and 7/16" for the smaller line).
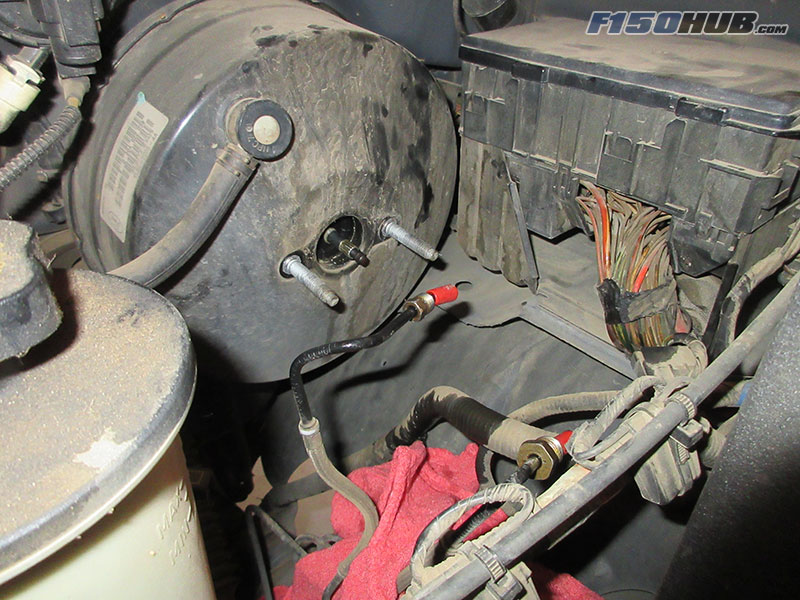
• The brake master cylinder mounts to the brake booster using (2) nuts. Remove the (2) nuts using a 14 mm socket/wrench.
• Carefully pull the master cylinder assembly flange over the studs in the brake booster. Drain any remaining fluid and dispose of properly.
• Optional - if desired, the replacement master cylinder can be bench bled at this point. We generally opt to bleed the master cylinder after it is installed in the vehicle.
• Install the replacement master cylinder to the brake booster; do not overtighten nuts.
• Install both brake lines into the master cylinder hand tight (they will be removed again in subsequent steps, there is no need to tighten down at this point).
• Fill the master cylinder reservoir with DOT 3 brake fluid.
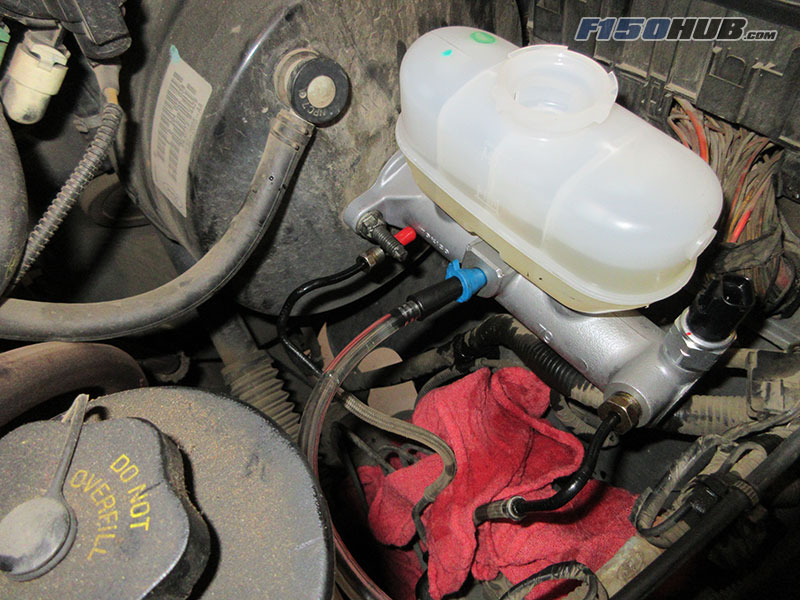
• Remove one of the brake lines and use an appropriate brake bleeding tool (MityVac MV8500 shown) to draw out any air in the master cylinder. Once fluid is extracted with no air bubbles, reinstall the brake line and snug down. Repeat for the second brake line port.
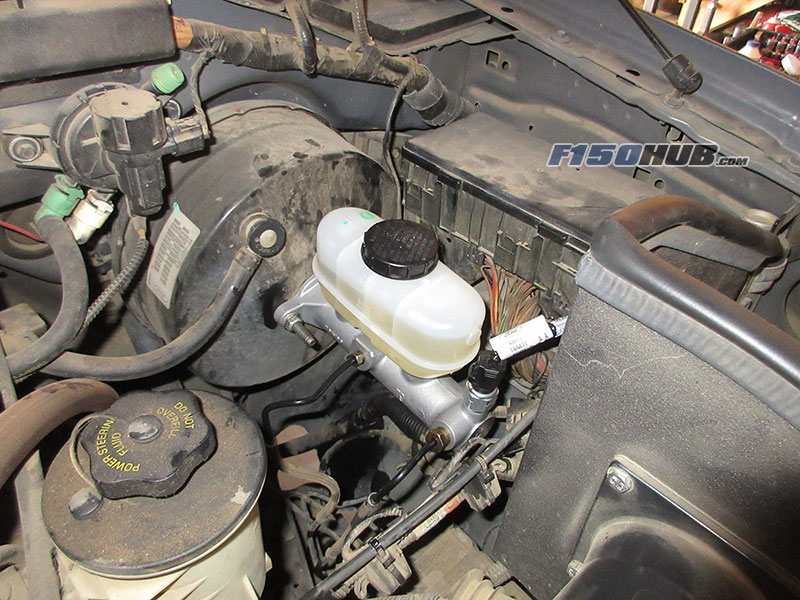
• Fill the master cylinder fluid reservoir to the fill line (or between the "max" and "min" fill lines) with new DOT 3 brake fluid.
• Reconnect the fluid reservoir level and brake pressure sensors.
• Pump the brake pedal and check for leaks, then test for proper operation. Recheck brake fluid reservoir after pumping brakes several times. If brakes hold pressure but have a soft, "spongy" feel, or you plan on flushing the brake lines, see: brake system bleeding procedures.