4.6L, 5.4L Spark Plug Guide
Model Year |
Engine |
Ford Part Number |
1997 - 2000 |
4.6L V-8 |
|
2001 - 2008 |
4.6L V-8 |
|
2009 - 2010 |
4.6L V-8 |
|
1997 |
5.4L V-8 |
|
1998 - 2007 |
5.4L V-8 |
|
2008 - 2010 |
5.4L V-8 |
Note - Always verify fitment for your application.
Part numbers not applicable to factory supercharged engines (Lightning, Harley Edition, etc).
There are a handful of "designer" spark plugs on the market, but there is no better choice than to select OEM Motorcraft spark plugs. The same can be said for ignition coils - there is no aftermarket alternative that is going to provide noticeable increases in performance or throttle response. The OEM Motorcraft COPs (coil-on-plug) are as high in quality (or higher) than any other brand on the market.
4.6L, 5.4L Spark Plug Replacement Procedures
Each spark plug is accessed through a bore in the cylinder head several inches below each individual ignition coil. For most cylinders, you will not be able to physically see the spark plug; this is primarily a blind operation. After disconnecting the negative battery cable and removing the plastic engine cover, the steps for replacing each spark plug are fairly straight forward:
• Unplug the ignition coil and fuel injector connectors to gain access to the coil retainer bolt.
• Remove the coil retaining bolt using a 7 mm socket. Use caution as not to lose the bolt in the engine valley - loosen the bolt with a socket, then unthread completely and remove it by hand.
• Pull the ignition coil upwards to remove; it may require a firm tug. It's perfectly normal for the insulator boot to separate from the rest of the coil. Just remove the boot from the cylinder head bore and reinstall it on the ignition coil.
• Use compressed air to blow out any debris from the bore in the cylinder head where the spark plug is located. Any dirt, dust, or grime that you don't remove may enter the cylinder when the spark plug is pulled.
• Use a 5/8" (1997 - 2003 model years) or 9/16" (2004+ model years) spark plug socket and a combination of extensions to remove the spark plug. The rubber boot inside the spark plug socket will secure the spark plug so it comes out when the socket is removed. Since visibility is poor at best, we recommend securing the socket and extension(s) onto the spark plug and verifying a firm fit before attaching your ratchet - the last thing you want is to strip the hex head.
• Once the spark plug is loose disconnect your ratchet and finish unthreading by controlling the extension by hand.
• Verify the gap of the replacement spark plug (refer to underhood emissions label for proper gap, it will vary with model year). Apply a light coating of anti-seize to the threads.
• Install the new spark plug by first placing it in the spark plug socket. Plugs must be started by hand to ensure that the soft aluminum threads of the cylinder head do not strip. Spark plugs should thread smoothly and completely without the use of a ratchet. Once the plug is threaded into place, install a ratchet and snug up the plug. Do not overtighten.
• Apply a dab of dielectric grease to the tip of the ignition coil, then reinstall the coil onto the spark plug. Verify that the coil is seated on the spark plug, then reinstall the retainer bolt, fuel injector connector, and ignition coil connector.
On bank 1 (passenger) of the engine, cylinder 4 is the most difficult plug to access. In order to decrease clutter and give yourself a larger work space, remove the cylinder 3 ignition coil and unplug the cylinder 3 fuel injector. You should then be able to squeeze a hand to the rear of the engine where the # 4 plug is located. (3) x 6" extensions and a swivel/u-joint are used to reach this plug. The exact same setup can be used to remove the cylinder 3 spark plug. Extensions will also be required to reach the ignition coil retaining bolt. Replacement of the #1 and #2 cylinders is fairly straight forward with only a 6" extension.
For bank 2 (driver side), cylinder 8 will require the use of a 7 mm wrench instead of a socket to remove the coil retainer bolt (the fuel rail limits access). A flexible extension can be used to remove the coil retainer on cylinder 7. (3) x 6" extensions and a swivel/u-joint can be used to remove the #7 and #8 spark plugs. The #6 spark plug is relatively straight forward to remove. Accessing the cylinder 5 plug, however, requires removing the power steering reservoir bracket (3 bolts using an 8 mm socket). With the bracket removed, the #5 plug can be accessed with relative ease.
4.6L and 5.4L Spark Plug Replacement, Cylinder by Cylinder
Click any thumbnail to view high resolution fullsize image w/ addition details (where applicable)
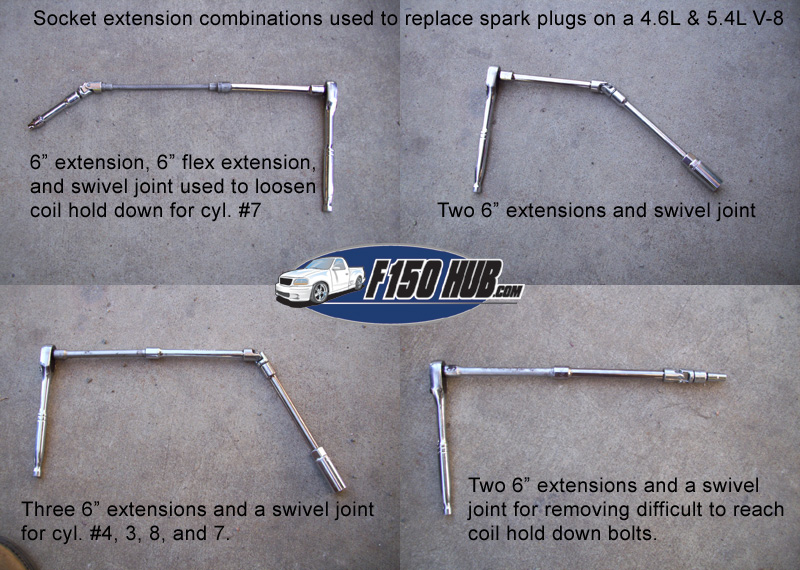
• An army of extensions and flex joints are required to reach the various spark plugs. Four different extension variations are required to change all 8 spark plugs.
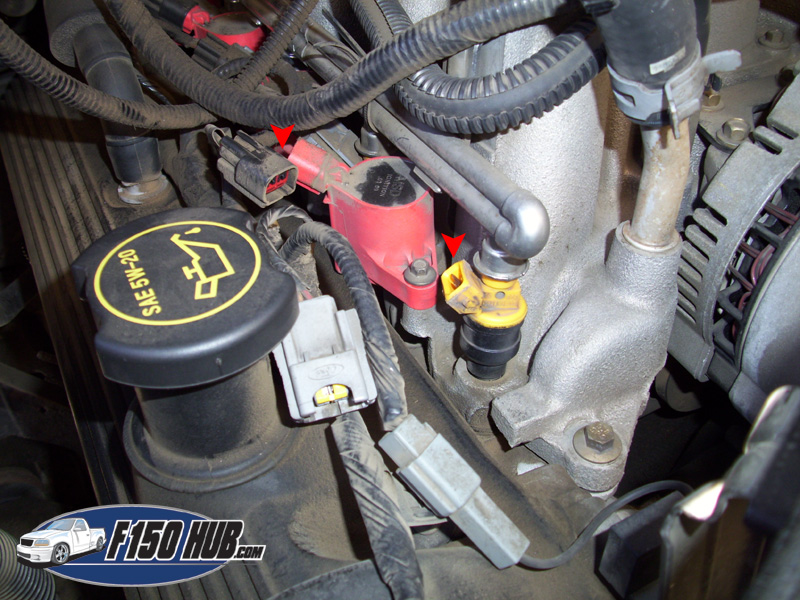
• Step 1 of the process is to remove the ignition coil and fuel injector connectors. Factory ignition coils are black - we've found the OEM coils last much longer than aftermarket replacements.
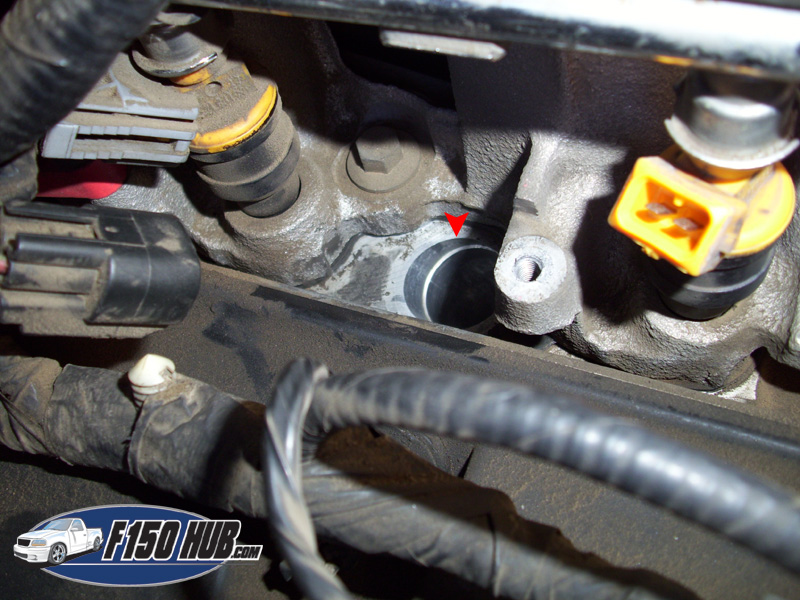
• The image at left provides a close up view of the bore in the cylinder head where the spark plugs are located. The base of the spark plug is several inches below the rim of the bore. Replacing the spark plugs is a blind operation for the more difficult to reach cylinders.
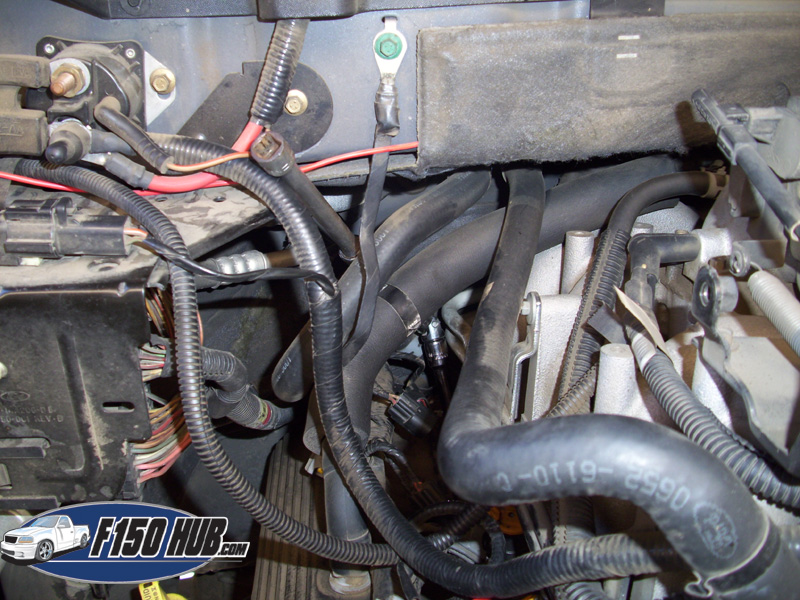
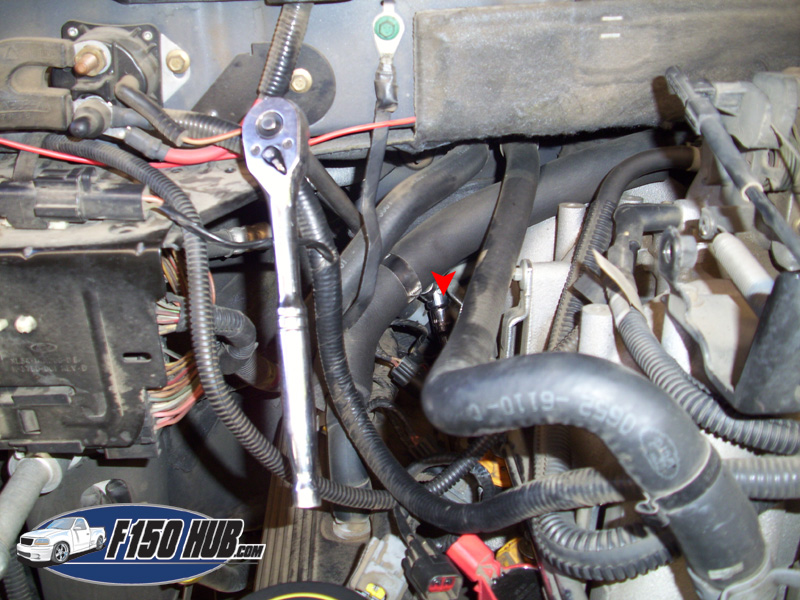
• An assortment of hoses makes it difficult to access the number 4 cylinder (passenger side, rearmost). The image at left displays one possible way to reach the spark plug with a series of extensions. We find it's helpful to add extensions as you go - start with a single extension and your socket, then add extensions once the socket is installed on the spark plug. This seems to be easier than maneuvering 16 inches worth of extensions into place at once.
• You should always support the socket extension with your free hand as you apply pressure to the ratchet. This keeps the socket perpendicular to the spark plug nut, minimizing the risk of stripping the nut or breaking off the tip.
• Certain ignition coil retaining bolts may also require the use a series of extensions and swivel/u-joints.
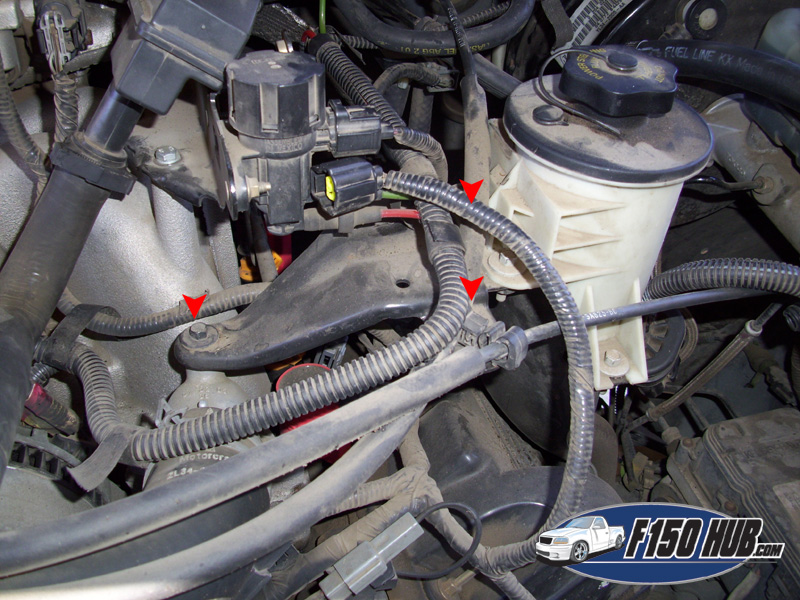
• Accessing the number 5 cylinder requires removal of the power steering fluid reservoir bracket (see image for reference).

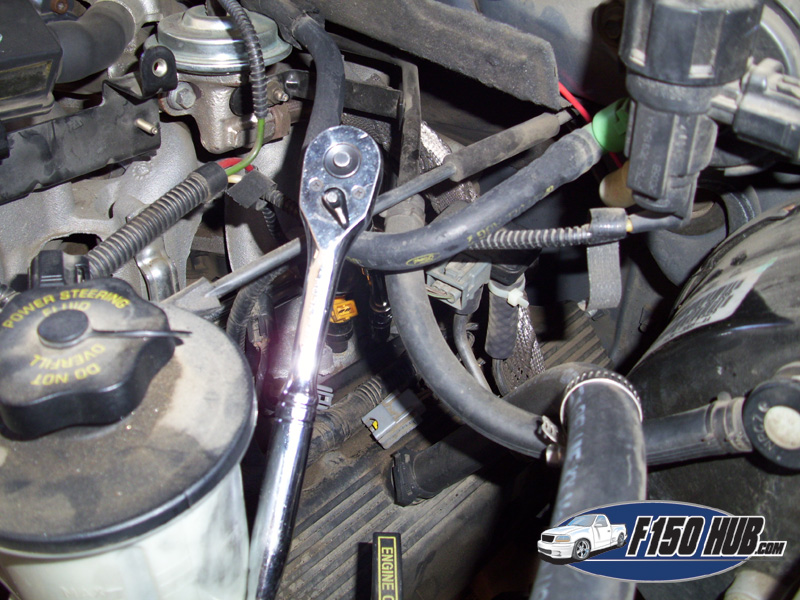
• (2) x 6" extensions can be used to easily remove the cylinder 5 spark plug. Notice that the spark plugs are not necessarily straight up-and-down within the cylinder heads - it is important to find the correct angle and support the socket as you apply force to the ratchet.

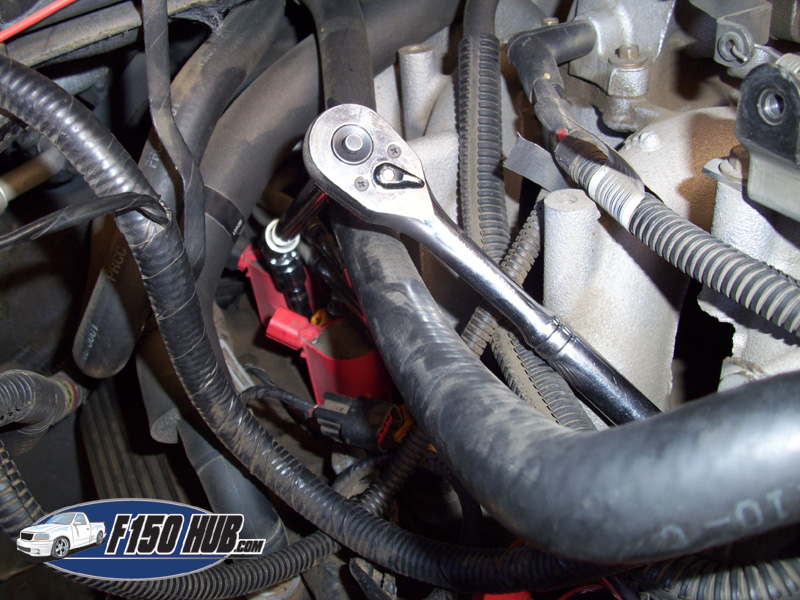
• Close up view of removing the cylinder 8 spark plug. Support the socket/extensions as not to damage the fuel rail; it's a tight fit.
• The # 8 cylinder also has an assortment of lines and hoses that make access difficult. However, the correct combination of extensions will slide right into place without necessitating removal of any of these lines.
Additional Tips & Considerations
• Each fuel injector connector has a red rubber gasket on the inside that tends to fall out. Make sure to reinstall the gasket and be cautious not to let one slip out of reach.
• If you find yourself having difficulty getting the thread of a spark plug started it is likely seated too deep into the spark plug socket, thereby not leaving enough thread exposed when the socket bottoms out. Try pulling the spark plug out of the socket ~ 1/8" to increase the length of the exposed thread. You wouldn't believe how long it took to identify this anomaly - you're welcome.
• No brand comes more highly recommended than the OEM Motorcraft spark plugs.
• Replacement spark plugs should come pre-gapped, but always double check and adjust as necessary. The proper gap for spark plugs is always listed on the underhood emissions label. The gap for 2v 4.6L and 5.4L engines is .054 to .056 inches.